
Unfortunately, my car insurance doesn’t cover the cost of repairing a chip on my windscreen. Rather than spend over £100 for my local garage to repair the chip, I thought I’d try and fix it myself using the Rain-X windscreen repair kit, which only costs £15.
The Chip On My Windscreen
The chip on my car windscreen was about the size of a pea. When I ran my finger across the chip, It felt like a small bit of glass was missing.
I didn’t bother to get the chip repaired initially, as it was very small and not particularly distracting. However, after several months the chip started to become more visible and needed repairing before it got any worse
No products found.
Does Rain-X Windscreen Repair Kit Work
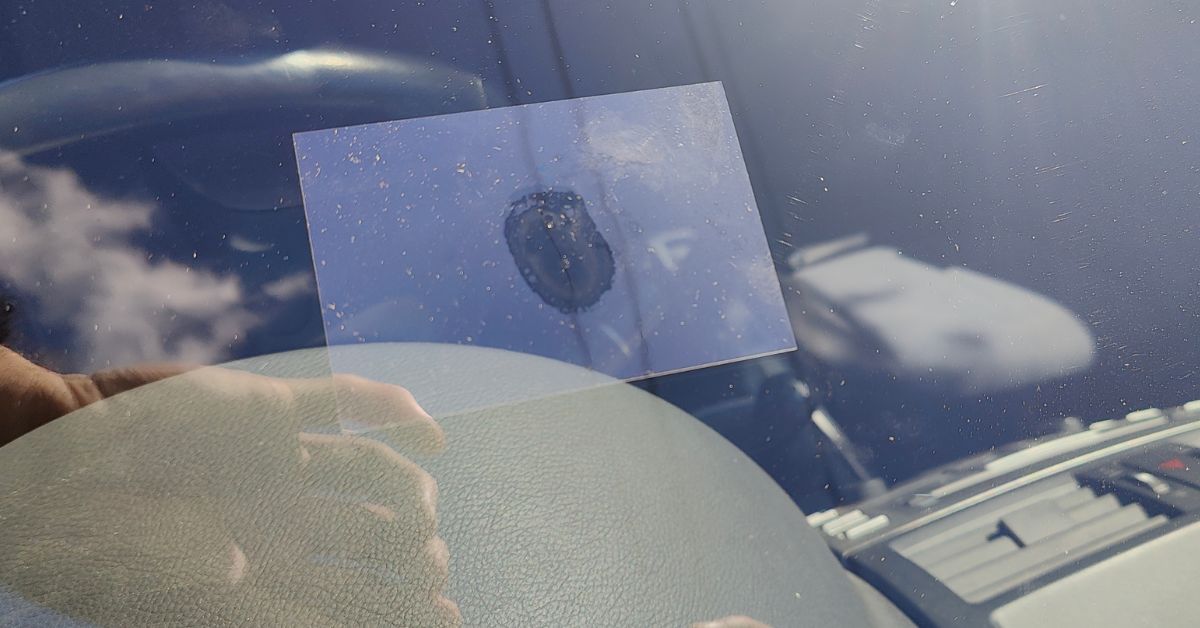
Yes, it does work; at least it worked the one time that I’ve used it. After I used the Rain-X Windscreen Repair Kit the chip was far less visible, but it hadn’t completely gone.
The photo below shows the chip before using the Rain-X repair and after.
Note: For some reason, my phone camera wouldn’t focus on the the chip, so the photos aren’t as clear as they could be, sorry.

Review Of Rain-X Windscreen Repair
I’ve only used the Rain-X repair kit on one occasion to repair a fairly small chip, so this isn’t an in-depth review.
Pros: Rain-X Windscreen Repair
- Easy To Use – The Rain-X repair kit I received didn’t include English instructions. I had to go to the Rain-X website and download the English instructions. Everything you need to repair the car windscreen is included in the kit and directions are easy to follow.
- It Works – The Rain-X repair kit did a good job of repairing the chip on my windscreen. I’d say the chip was 80% less visible after the repair.
- Good Price – The Rain-X repair kit sits in the middle ground on price compared to competing products. When compared to the cost of a garage or a company like Autoglass repairing a chip the Rain-X offers very good value
- Multiple Applications – Many of the windscreen repair kits available online were only good for one repair. The Rain-X repair kit can be used to repair multiple chips and cracks.
- Fast – The total time I spent repairing the chip on my windscreen was about half an hour. Most of that time was spent waiting for the resin to dry
No products found.
Cons: Rain-X Windscreen Repair
- Not Perfect —The Rain-X resin did a very good job repairing my windscreen chip. However, the chip didn’t completely disappear. I’m not sure if the chip didn’t fully disappear because I didn’t follow the instructions perfectly or because the kit can’t do a perfect repair.
How To Use Rain-X Windscreen Repair Kit
Using the Rain-X repair kit is fairly easy. Below are the steps, with pictures, that I took to repair the chip in my car windscreen.
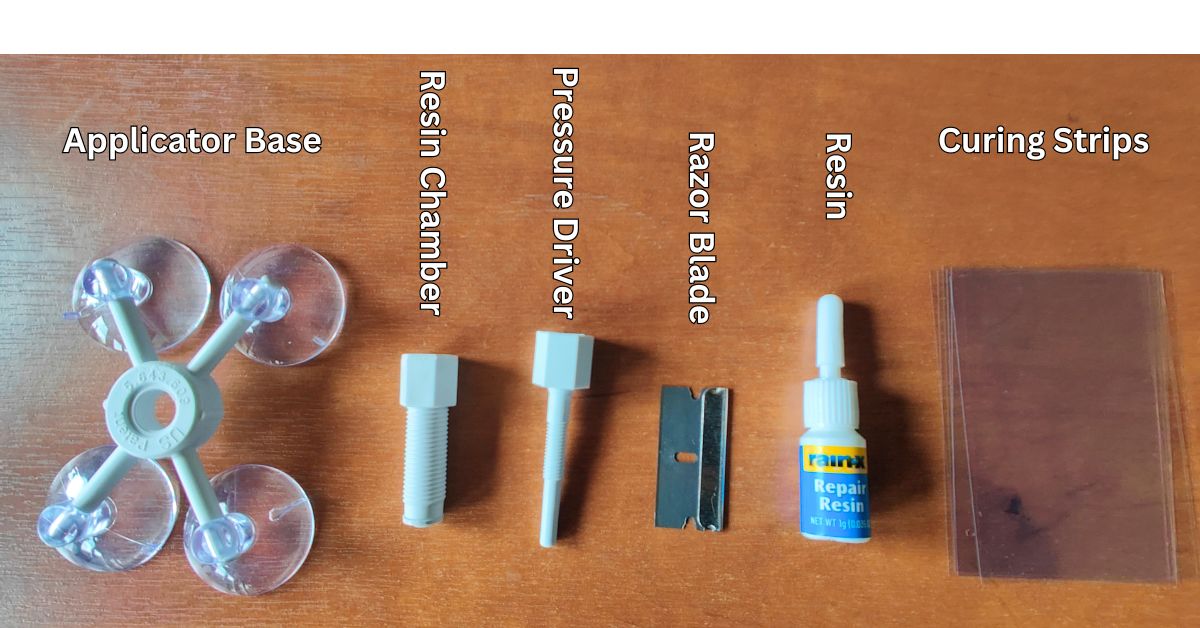
Step 1 – Remove Loose Fragments Of Glass
I used the razor blade that comes with the kit to scrape out loose glass. Then, I blew on the chip to help remove any tiny bits of glass.
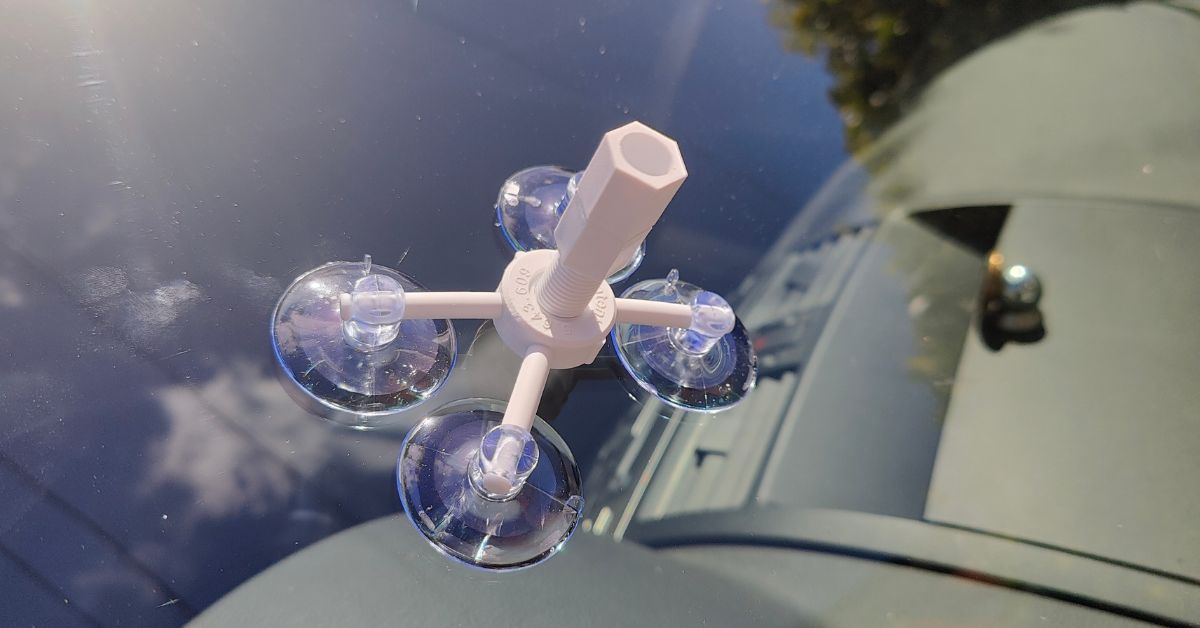
Step 2 – Fix Applicator Base To Windscreen
I used a duster to wipe the area around the chip in the windscreen so that the suckers would firmly attach the applicator base to the windscreen.
Apply the applicator base so the hole in the middle is directly above the chip.
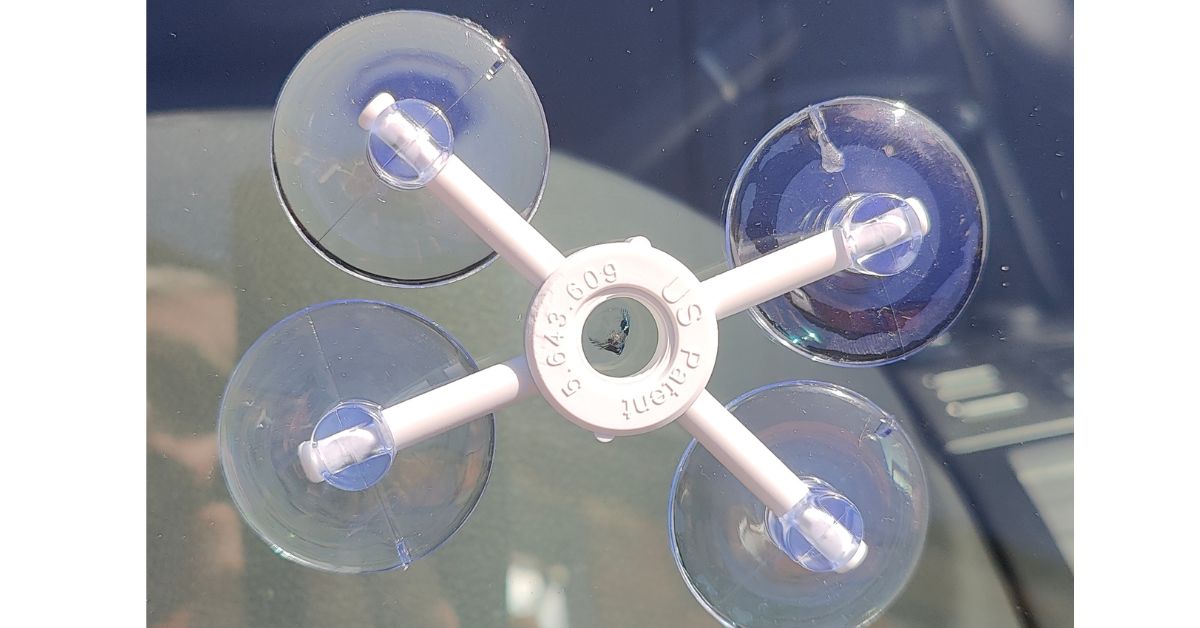
Step 3 – Screw In Resin Chamber
Screw the resin chamber into the applicator base. The rubber bottom of the resin chamber should be directly on top of where the glass has chipped. I kept screwing the resin base down until it was firmly in place.
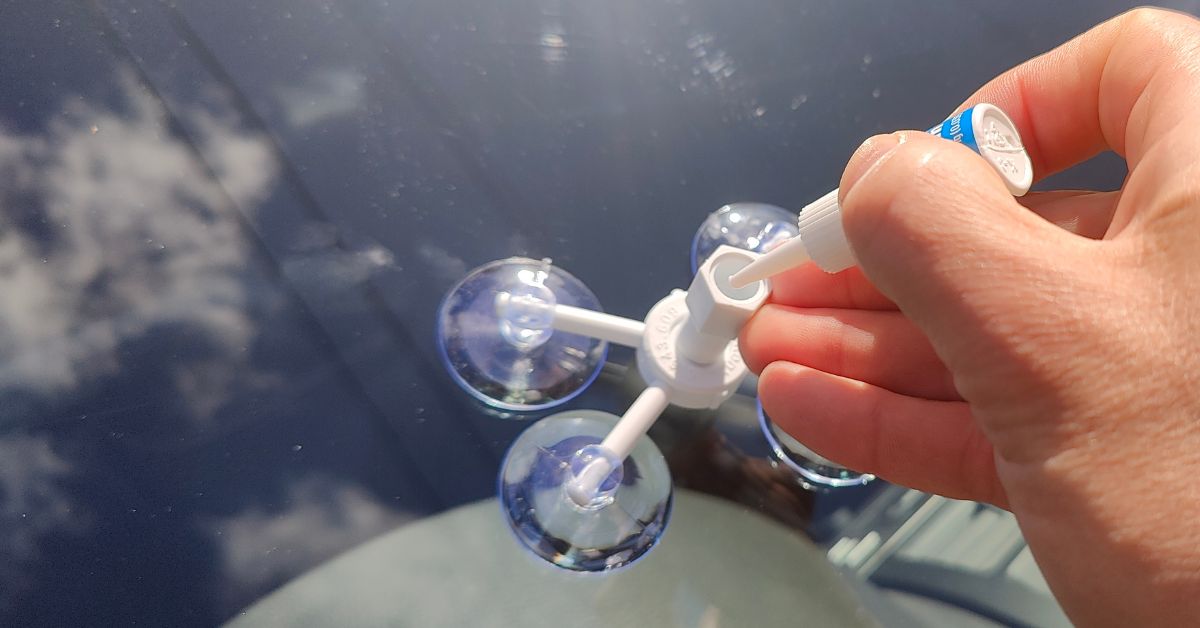
Step 4 – Apply Resin Drops
Squeeze in about 6 drops of resin into the top of the resin chamber. Wait about 30 seconds, to allow all the resin to reach the bottom of the resin chamber
Step 5 – Apply Pressure
Screw the pressure driver into the resin chamber until it is nearly fully screwed in. I waited about 5 minutes to allow all the resin to soak into the chip. The Rain-X instructions suggest heating the glass on the inside using a hair dryer. Apparently, this can help the resin reach all areas of the damaged windscreen. I didn’t other doing this.
Step 6 – Allow Air To Escape
After the 5 minutes, fully unscrew the pressure drive and then reinsert the pressure driver and screw it down again. Doing this will help remove any air bubbles that may have got trapped. Leave in place for another 5 minutes
Step 7 – Remove Applicator
After 5 minutes have passed, turn the pressure driver and resin champer half a turn anti-clockwise, to loosen. Then pull up the suction tabs to remove the applicator from the car windscreen.
Step 8 – Apply Curing Strip
Wipe the chip and the surrounding area down. Then apply a few drops of resin directly onto the chip and place a curing strip over the top. The curing strip should stay in place until the resin has dried, which is about 10 minutes. Ideally, the resin should be exposed to sunlight for the resin to cure.
Step 9 – Scrape Of Excess Resin
Once the resin has dried, remove the curing strip and use the razor blade to scrape away any excess resin.
Step 10 – Check Results
With any luck, the chip in the windscreen should be far less visible. When I used the Rain-X it did a good job but didn’t completely repair the chip.
No products found.
Conclusion: Using Rain-X Windscreen Repair Kit
The Rain-X windscreen repair kit has worked pretty well on the small chip on my car windscreen. It’s saved me at least £90 by not having to go to a garage or getting a company like Autoglass (who are super expensive) to come out and do the repair.
I think after the Holts Tyreweld, the Rain-X Windscreen repair kit is the second most useful car repair product that I’ve used. It works well at a very reasonable price.
No products found.
FAQ: Rain-X Windscreen Repair Kit
-
What types of damage can the Rain-X Windscreen Repair Kit fix?The kit is designed to repair small chips, bullseyes, and cracks in your windscreen that are up to 25mm (1 inch) in diameter and 25mm (1 inch) in length. It works best on damage that hasn’t penetrated the inner layer of the windscreen.
-
Can I use the Rain-X Windscreen Repair Kit on all types of windscreens?
The kit is compatible with most laminated windscreens commonly found in cars. However, it may not be suitable for use on tempered or heated windscreens. -
How long does it take to complete a repair with the Rain-X Windscreen Repair Kit?
The repair process typically takes around 30 minutes. -
Will the repair be invisible?
While the repair can significantly improve the appearance of the damaged area, it may not always be completely invisible. Factors such as the size and type of damage, as well as the skill of the person performing the repair, can affect the final result. -
Is the repair permanent?
The repair provided by the Rain-X Windscreen Repair Kit is intended to be a long-lasting temporary repair. It prevents the damage from spreading further and compromising the structural integrity of the windscreen. -
Can I use the vehicle immediately after repairing with the Rain-X Windscreen Repair Kit?
It’s recommended to wait at least an hour after completing the repair before driving the vehicle. This allows the resin to fully cure and bond with the windscreen, ensuring maximum effectiveness. -
Can I use the Rain-X Windscreen Repair Kit for multiple repairs?
Depending on the size of the damage, the kit typically contains enough resin and accessories to perform several repairs. -
Is the Rain-X Windscreen Repair Kit difficult to use? The kit is designed to be user-friendly and does not require any special skills or expertise. However, it’s essential to carefully follow the instructions provided with the kit to ensure successful results.
No products found.